有用户反馈更新后不行,BUG已修复,主要是第三部分File Name不能乱动~
这次代码做了很大的更新,方便大家通过GA4收集更多的数据。不管是新朋友还是老朋友,只需查看最新的这篇文章即可,老朋友只需要更新代码即可。
代码更新内容:
代码更新了,修复了和产品目标相关的小问题
Sh_info event增加了 User type, content type, customer id, last order date, total order quantity, total expenditure, and customer tag fields
增加了新的产品变量:productSku, productType, productVariantId, productVariantTitle and currency.
增加了新的交易变量:orderItemsSku, orderItemsvariantId, orderItemsvariantTitle,orderItemsCategory,orderItemsBrand,orderItemsType
为多货币的商店增加了货币汇率和静态订单金额变量:totalValueStatic, currencyRate.
根据Shopify的结账流程,如果OrderID字段是空的,transaction_id字段被调整为传输结账ID。
-
Item data(line_item)会根据checkout 对象修改
1. 注册GTM: https://tagmanager.google.com
粘贴GTM code在shopify theme.liquid & checkout
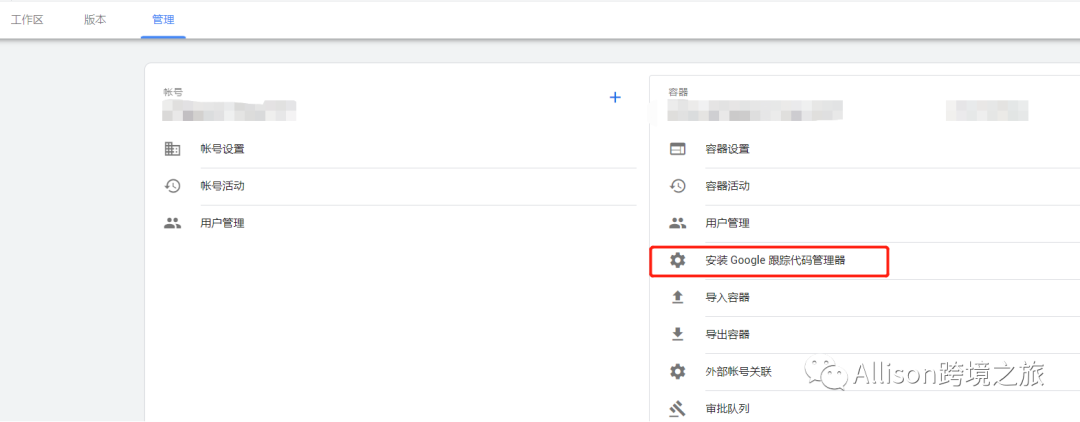
找到GTM追踪代码:
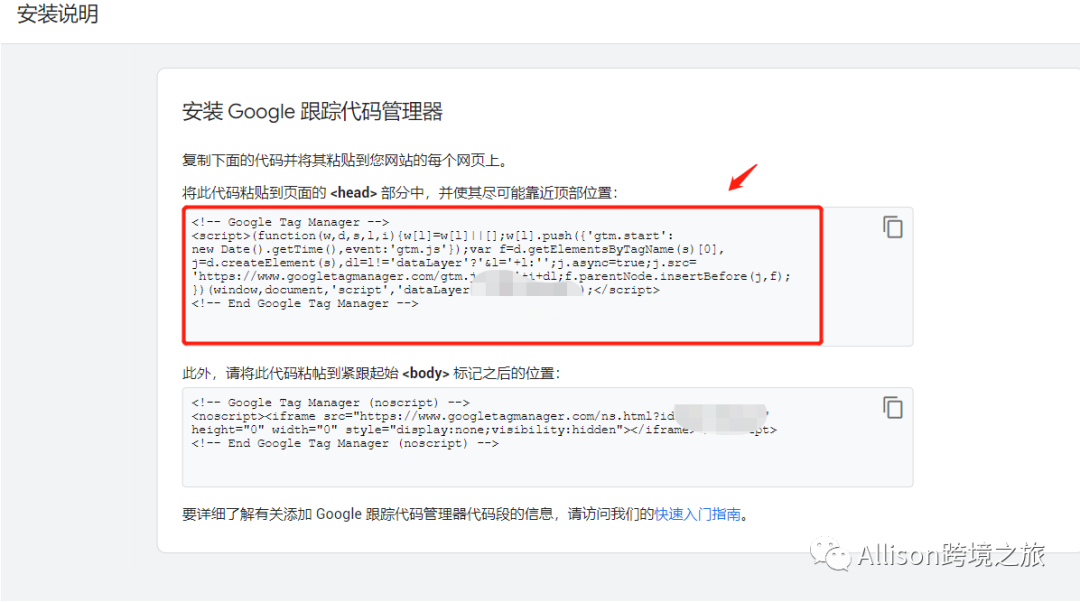
回到Shopify粘贴在theme liquid和checkout页面
Shopify——Theme——Actions下拉选择Edit Code

shopify——Setting——Checkout——Additional scripts处填充

2.粘贴Shopify dataLayer (Checkout - Purchase) 2.1版本
目的:通过以下代码可以让GTM读取和处理。该代码块包括以下变量:购买的产品、页面类型、货币、运输价格、总价、税价、支付类型和交易ID。我们能够把所有这些数据传递给Google Ads、Facebook Pixel、Google Analytics 4和其他你想分享的各方。
如下在checkout GTMcode下面
*********************************START*********************************
{% assign template_name = template.name %}
<script type="text/javascript">
window.dataLayer = window.dataLayer || [];
window.appStart = function(){
window.allPageHandle = function(){
window.dataLayer.push({
event: "ga4kit_info",
contentGroup: "{{ template_name }}",
{% if customer %}
userType: "member",
customer: {
id: "{{- checkout.customer.id | json -}}",
lastOrder: "{{- customer.last_order.created_at | date: '%B %d, %Y %I:%M%p' -}}",
orderCount: "{{- checkout.customer.orders_count | json -}}",
totalSpent: "{{- checkout.customer.total_spent | times: 0.01 | json -}}",
tags: {{- checkout.customer.tags | json -}}
}
{% else %}
userType: "visitor",
{% endif %}
});
};
allPageHandle();
{% if first_time_accessed and post_purchase_page_accessed != true %}
var shippingPrice = "{{shipping_price | money_without_currency }}".replace(",", ".");
var totalPrice = "{{checkout.total_price | money_without_currency }}".replace(",", ".");
var taxPrice = "{{tax_price | money_without_currency }}".replace(",", ".");
var orderItemsName = [];
var orderItemsId = [];
var orderItemsCategory = [];
var orderItemsBrand = [];
var orderItemsType = [];
var orderItemsPrice = [];
var orderItemsSku = [];
var orderItemsvariantId = [];
var orderItemsQuantity = [];
var orderItemsvariantTitle = [];
var totalQuantity = 0;
{% for line_item in checkout.line_items %}
orderItemsName.push("{{ line_item.product.title | remove: "'" | remove: '"'}}");
orderItemsId.push("{{ line_item.product_id }}");
orderItemsPrice.push("{{ line_item.price | times: 0.01 }}");
orderItemsSku.push("{{ line_item.sku | remove: "'" | remove: '"' }}");
orderItemsQuantity.push("{{ line_item.quantity }}");
orderItemsvariantId.push("{{ line_item.variant_id }}");
orderItemsvariantTitle.push("{{ line_item.variant.title }}");
orderItemsCategory.push("{{ line_item.product.collections.last.title | remove: "'" | remove: '"' }}");
orderItemsBrand.push("{{ line_item.vendor | remove: "'" | remove: '"' }}");
orderItemsType.push("{{ line_item.product.type | remove: "'" | remove: '"' }}");
totalQuantity += {{ line_item.quantity }};
{% endfor %}
window.dataLayer.push({
page_type: "purchase",
event: "analyzify_purchase",
currency: "{{ shop.currency }}",
totalValue: totalPrice,
totalValueStatic: totalPrice,
currencyRate: window.Shopify.currency.rate,
shipping: shippingPrice,
tax: taxPrice,
payment_type: "{{order.transactions[0].gateway}}",
{% if order.name %}
transaction_id: "{{order.name | remove: "'" | remove: '"'}}",
{% else %}
transaction_id: "{{checkout.id | remove: "'" | remove: '"'}}",
{% endif %}
productName: orderItemsName,
productId: orderItemsId,
productBrand: orderItemsBrand,
productCategory: orderItemsCategory,
productVariantId: orderItemsvariantId,
productVariantTitle: orderItemsvariantTitle,
productSku: orderItemsSku,
productType: orderItemsSku,
productPrice: orderItemsPrice,
productQuantity: orderItemsQuantity,
});
{% endif %}
}
appStart();
</script>
************************************END**********************************
3. 粘贴Shopify Product View Data Layer
点击Theme,打开Snippets,然后添加File name: analyzify-product-datalayer

粘贴以下代码然后保存
*************************************START*******************************
{% assign template_name = template.name %}
<script type="text/javascript">
window.dataLayer = window.dataLayer || [];
window.appStart = function(){
window.productPageHandle = function(){
var productName = "{{ product.title | remove: "'" | remove: '"' }}";
var productId = "{{ product.id }}";
var productPrice = "{{ product.price | money_without_currency }}";
var productBrand = "{{ product.vendor | remove: "'" | remove: '"' }}";
var productCollection = "{{ product.collections.first.title | remove: "'" | remove: '"' }}";
var productType = "{{ product.type | remove: "'" | remove: '"' }}";
var productSku = "{{ product.selected_or_first_available_variant.sku | remove: "'" | remove: '"' }}";
var productVariantId = "{{ product.selected_variant.id | default: product.variants[0].id }}";
var productVariantTitle = "{{ product.selected_variant.title | default: product.variants[0].title }}";
window.dataLayer.push({
event: "analyzify_productDetail",
productId: productId,
productName: productName,
productPrice: productPrice,
productBrand: productBrand,
productCategory: productCollection,
productType: productType,
productSku: productSku,
productVariantId: productVariantId,
productVariantTitle: productVariantTitle,
currency: "{{ shop.currency }}",
});
};
window.allPageHandle = function(){
window.dataLayer.push({
event: "ga4kit_info",
contentGroup: "{{ template_name }}",
{% if customer %}
userType: "member",
customer: {
id: "{{- checkout.customer.id | json -}}",
lastOrder: "{{- customer.last_order.created_at | date: '%B %d, %Y %I:%M%p' -}}",
orderCount: "{{- checkout.customer.orders_count | json -}}",
totalSpent: "{{- checkout.customer.total_spent | times: 0.01 | json -}}",
tags: {{- checkout.customer.tags | json -}}
}
{% else %}
userType: "visitor",
{% endif %}
});
};
allPageHandle();
{% case template_name %}
{% when "product" %}
productPageHandle();
{% endcase %}
}
appStart();
</script>
***************************************END*******************************
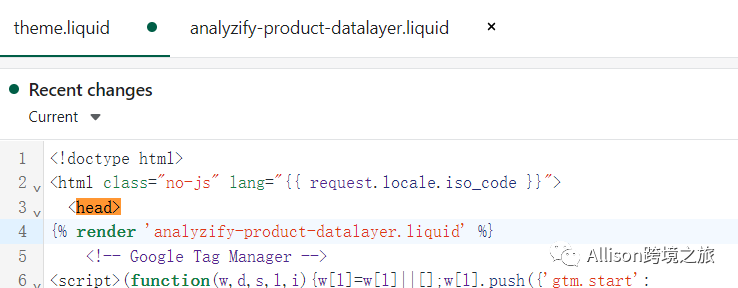
然后复制这个代码: {% render 'analyzify-product-datalayer.liquid' %}
粘贴在theme liquid的<head>中
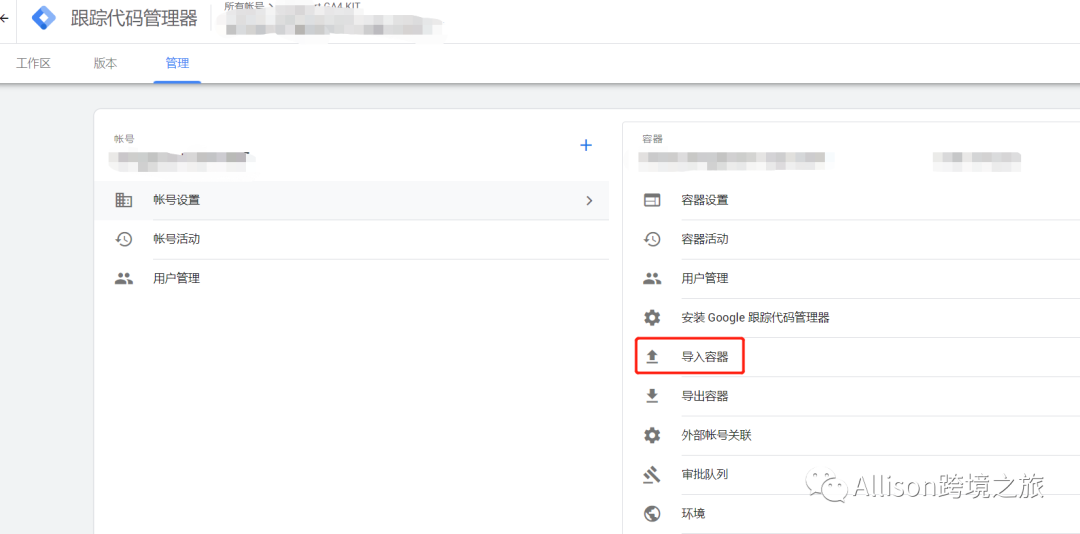
4. 将容器导入GTM
容器领取方式见文末
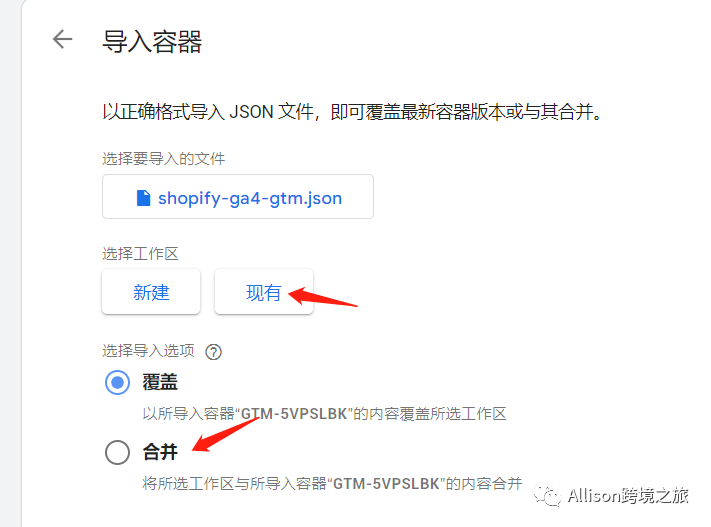
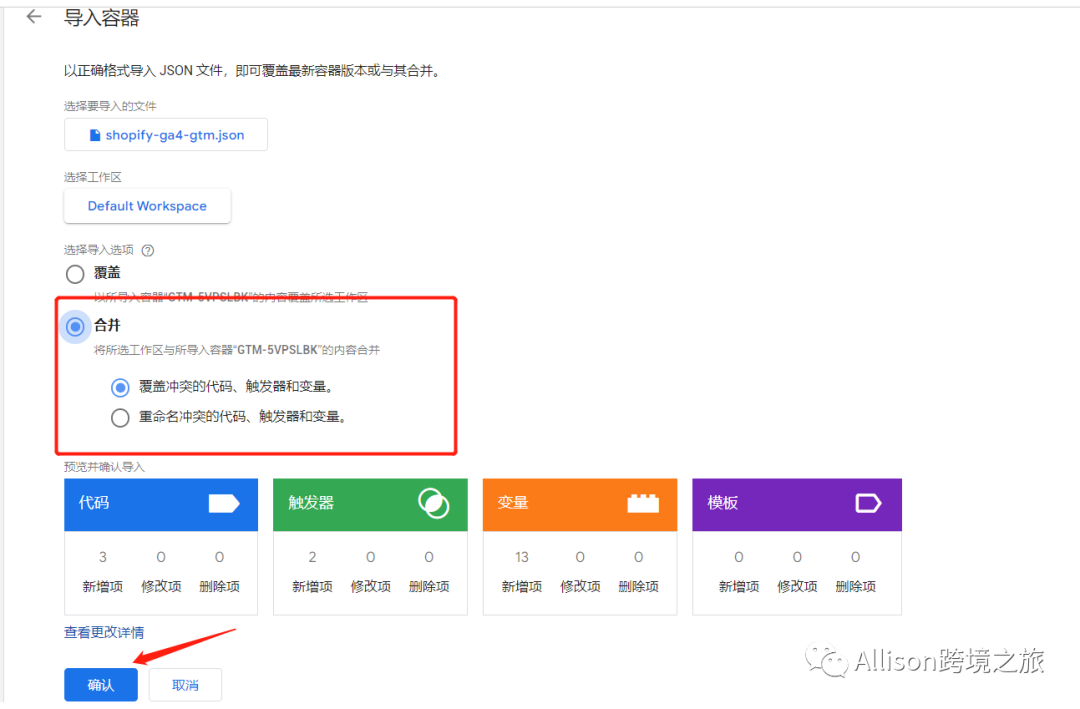
点击确认之后返回点击右上角的提交直接发布。
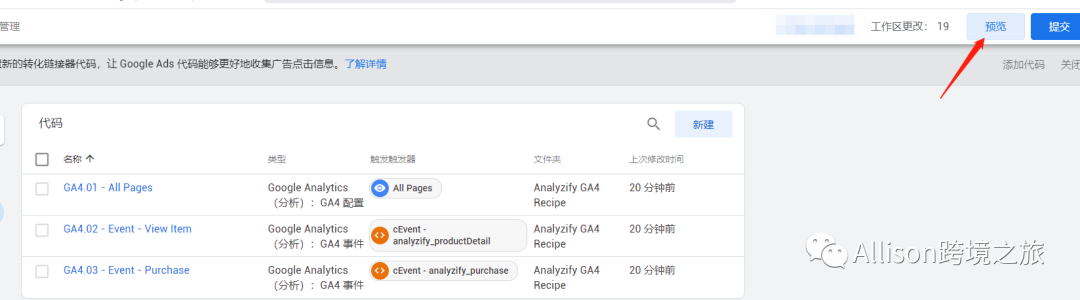
然后点击文件夹,再次检查确认自己的GA4代码是否有误


完成后如下

5.最后验证代码是否可行

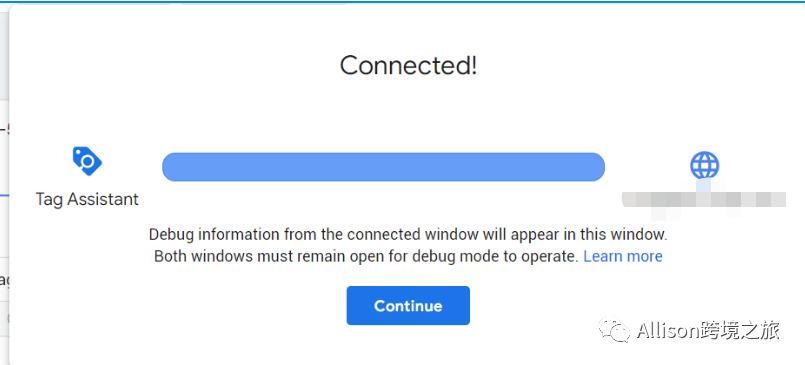
链接成功后会跳转你的网站,你网站页面出现如下提示就是成功了
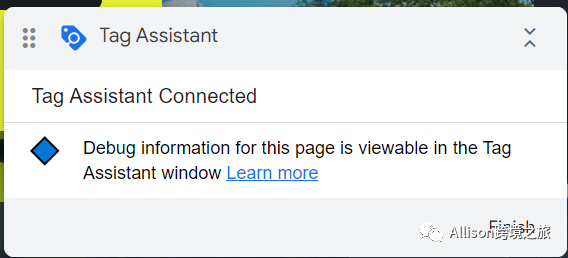
Tagassistant的页面也会出现链接成功的提示如下
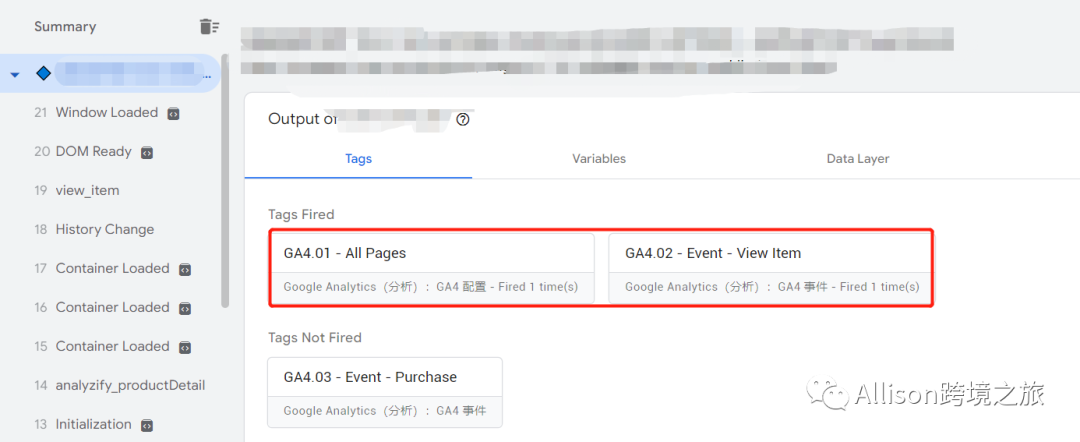
通过TAG ASSISTANT检查事件是否触发成功
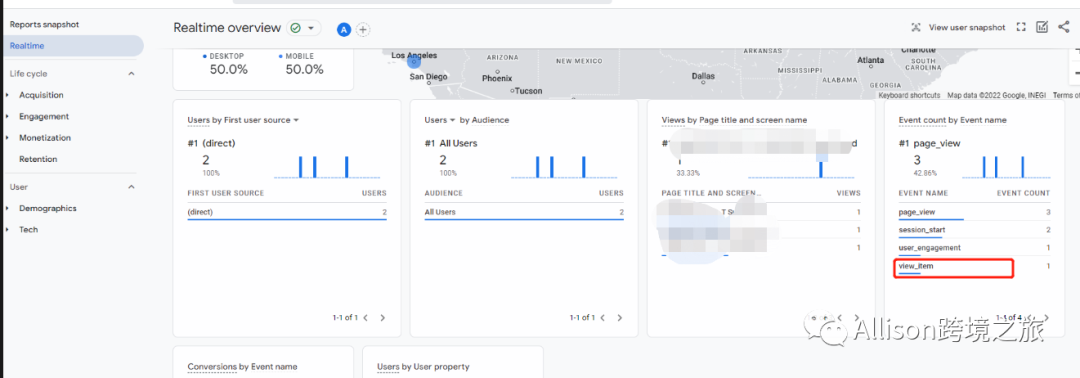
回到我们的GA页面就可以看到更加详细的产品信息显示在报告里面

公众号发送消息“GA4容器2.1”即可领取最新容器~
文章为作者独立观点,不代表DLZ123立场。如有侵权,请联系我们。( 版权为作者所有,如需转载,请联系作者 )

网站运营至今,离不开小伙伴们的支持。 为了给小伙伴们提供一个互相交流的平台和资源的对接,特地开通了独立站交流群。
群里有不少运营大神,不时会分享一些运营技巧,更有一些资源收藏爱好者不时分享一些优质的学习资料。
现在可以扫码进群,备注【加群】。 ( 群完全免费,不广告不卖课!)


发表评论 取消回复